The options are endless with embroidery hoop art, let your creativity flow and see where it takes you. Experiment with the fabric you use, the colour theme, machine or hand embroidery, decorative sewing stitches, adding embellishments, painting your hoop or covering it in fabric, create a matching set or a large stand alone feature piece.
Framed Embroidery Hoops make a great little present idea, (perfect for a baby shower or new baby gift), a present for a friend or relative who appreciates a ‘handcrafted gift’ or just something to brighten up your little one’s bedroom.
Pinterest is full of inspiration for this very popular craft at the moment – have a look see here.
Supplies needed:
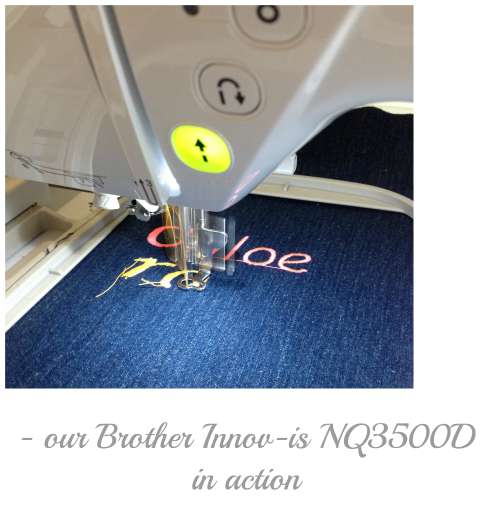
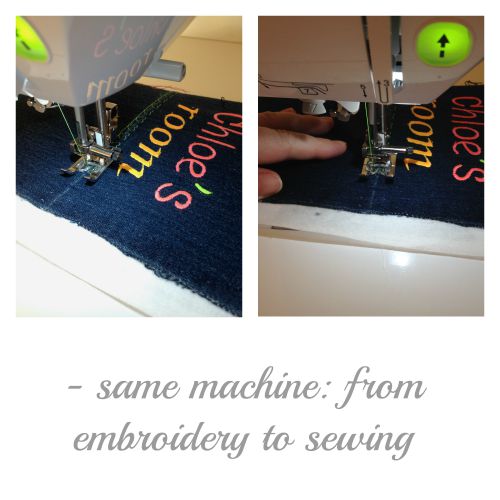
- Embroidery and Sewing machine. We used the new Brother Innov-is NQ3500D– perfect for swapping between both techniques all on one machine
- Fabric – we used upcycled denim off-cuts
- sewing & embroidery threads – we used bright neon colours
- wooden embroidery hoop – the size is up to you
- hot glue gun
- string, thread or thin rope to hang your hoop
- general sewing accessories – scissors
- interfacing that is suitable for your fabric choice
Directions:
- firstly you need to decide:
- what wording you would like to put on your sign
- what size hoop you would like to use
- what colour theme you are going to work with
- what fabric are you going to use
- Attach interfacing to the back of your fabric ready to embroider. If you are unsure which backing to use or which is the best fit for your fabric choice why not chat with your local haberdashery store for the best option
- Set up your embroidery pattern on your machine. We used the new Brother Innov-is NQ3500D which has an amazing range of built-in font and image designs to choose from
- Following your specific machines instructions attach your fabric to your embroidery arm and embroider your design on your fabric
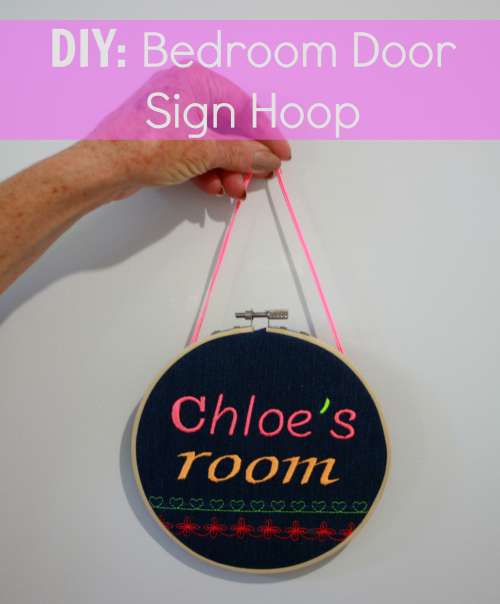
- Next why not add some decorative stitching to your design – after we used our machines embroidery function to create the wording on our hoop design “Chloe’s Room’, we then swapped over to our sewing function to create the two lines of decorative stitch. Our Brother machine is really easy to use and swap between embroidery and normal sewing all on the one machine.
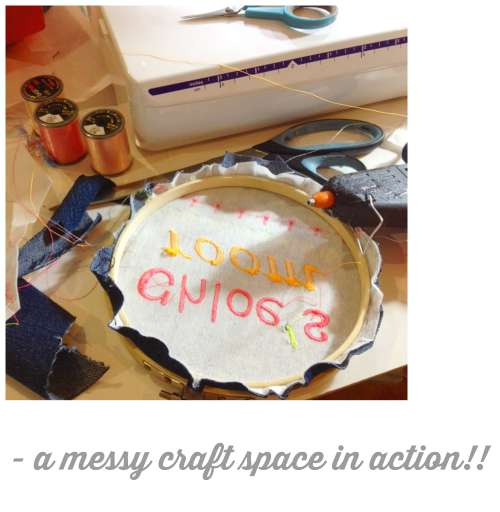
- After you have finished all your stitching flip your fabric over and trim any loose threads
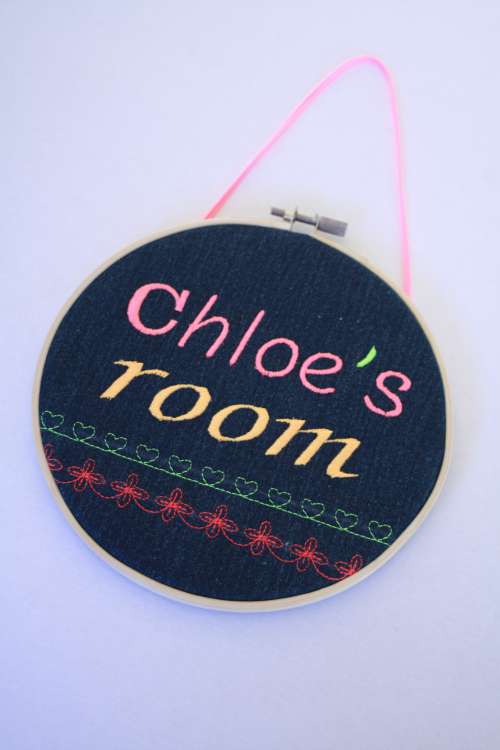
- Next line up and attach your fabric to your wooden embroidery hoop. Here are two links to some great tutorials to show you step by step how to do this step. We used the hot glue gun method – here & here
- Last step is to attach a loop at the top of the hoop to hang up your beautiful creation – you could use thin rope, cord, thread or twine.
Hope you had fun creating your Bedroom Door Sign Hoop – what colours and designs did you end up using? Feel free to share your creations and links below in the comments.
DIY – Bedroom Door Sign Hoop