Make! DIY Bunting
Everywhere you look you will see bunting. Its fun, cheap and easy to make. There are loads of variations you can use. Below is a basic step-by-step tutorial, but why not try some of our suggestions to give it your own flavour!
A great project if you are just learning to sew and want to keep things simple.

To make 3 metres of bunting you will need:
- Card stock to make flag templates
- Fabric for bunting flags
- 3 m of bias binding. 20mm width bias is perfect for this bunting
- Sewing machine and general sewing accessories
Steps:
1- Your flags can be any size. Mix it up a little and do 2-3 different sizes.
2- Measure and cut two templates out of your card stock. Mine are – Large : 21cm wide x 21cm in length – you will need 6 x 2 pieces – Small : 15 cm wide x 16cm in length – you will need 5 x 2 pieces
3- Leave 2 x 40 cm tails at the end of your bias for tying your bunting.
4- With right sides of fabric triangles together, using a small 2/8 inch seam, sew a ‘V ‘ and leave top open
5- Clip your flag point
6- Turn flags in the right way
7- Press with your iron
8- Take your binding and place the first flag in between binding and sew with a straight stitch.
9- Add a finger space in between each flag and alternate the sizes until you have used all your flags.

Suggestions:
- Flags don’t need to be triangular in shape “ try half moons or squares
- Add a handmade binding in a contrasting colour, this will make your bunting awesome and unique. It is worth the extra time to make your own.
- Bunting doesn’t need to only be in fabric – try card, pvc or oilcloth, hessian, doilies from the op shop or even crochet some triangles.
- Add letters to spell a name or occasion.
- Instead of flags having an internal seam, sew seam on the right side of the fabric and clip edges with pinking shears.
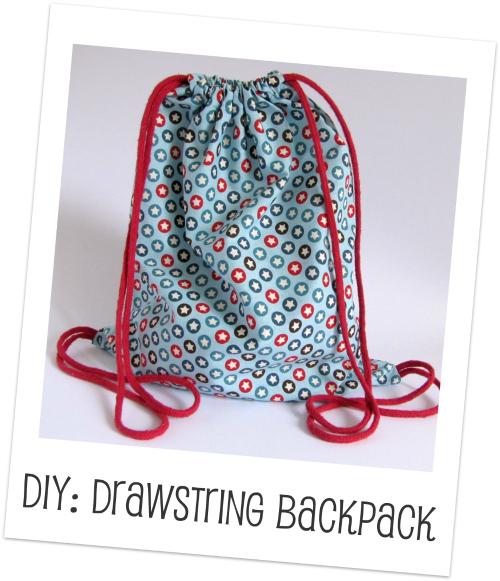
WANT MORE? How about making your own Drawstring Backpack.
Follow here for the full DIY tutorial.
DIY – Make a Drawstring Backpack
This guest post is from Jodie Maloni of The Haby Goddess. Want more crafty goodness? Head to her blog for lots of crafty tutorials like this one and her shop for the materials to get creating!
Make! DIY Bunting
Make your own Bunting with this easy tutorial Click To TweetPowered by Creative Market

[…] once you have these gorgeous fabrics? Make some Christmas bunting! Or some cute Christmas kids’ outfits for the big day! printDigg Diggvar […]
Hi! I featured your post on bunting on my blog with a link to your bunting tutorial after making some myself! Please go and check it out 🙂 http://www.heytheredelilahfashion.blogspot.com
Thanks for sharing Sune 🙂 I’ve just stopped by your lovely Blog!
[…] simple bunting/garland tutorial.Source: To Learn “Make Your Own Bunting” DIY Crafts click here Categories: DIY, Miscellaneous Tags: bunting, flags, […]