It is Sew a Softie month and we are very excited to be joining in the fun this year.
What is Sew a Softie you might ask? Firstly, besides being a whole lot of fun, it is an initiative aimed at igniting a love of hand sewing in the next generation. Sew a Softie’s founder Trixie hopes to encourage parents and kids to turn off the tv, step away from the computer and put down that phone and discover the fun of creating a simple softie together from scratch. Get creative, have fun- there are no rules and you don’t need to be a sewing whiz to give it a try.
This year Sew a Softie runs from July 1st to 31st. Myself and 30+ other crafty bloggers from around the world are joining in to share a whole lot of fun softie tutorials for you.
You can follow the 2017 blog hop here– there is a new tutorial added each day. Scroll down to the end of my tutorial to see some of my favourite projects from the list too.
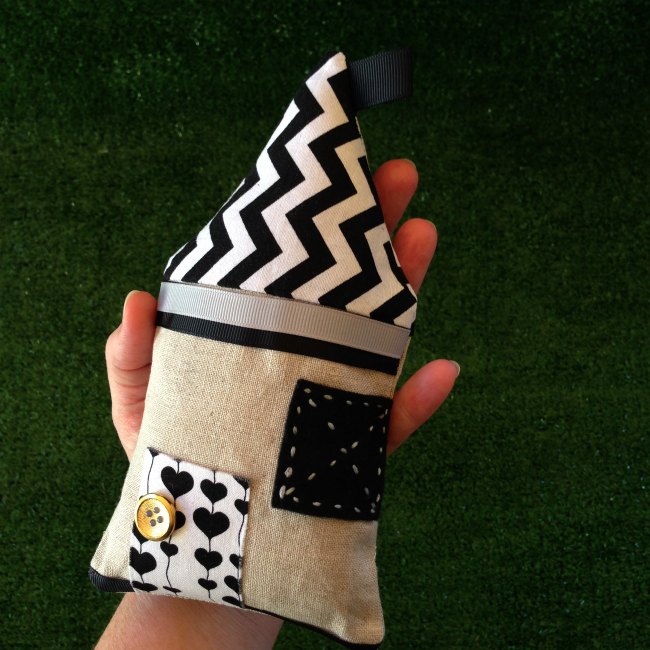
Sew a Little House Softie
I’ve always wanted to sew up a little house softie. Over the past few years I have seen some AMAZING handmade little houses created by some very clever handmade businesses. We only had enough time to whip up one little house this week but my little miss and I already have a stack of fabric earmarked for our next little house.
The great thing about this tutorial is that you can make the house any size you like. Create a small one and use up all your little fabric off-cuts laying around your craft room or finally cut into that special piece of fabric you have been saving up and make a big one!
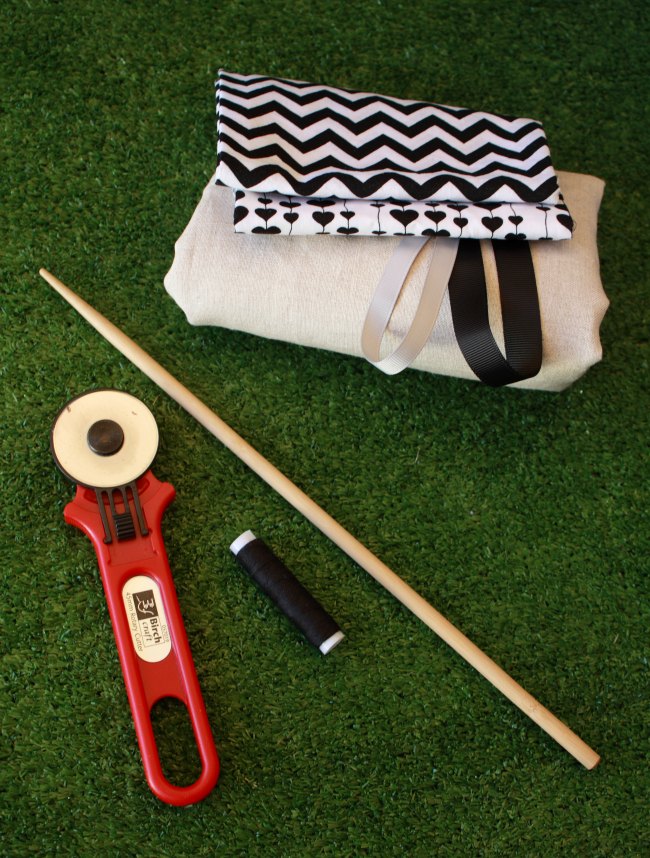
Supplies needed:
- fabric -we used a linen for the body of the house and cotton fabric for the roof and door
- felt sheet
- grosgrain ribbon
- buttons
- softie filling
- sewing machine (optional)
- sewing supplies – needles, cotton thread, embroidery thread, scissors, roller cutter, measuring tape
How to make your little house:
- make your house as little or as large as you like- our little house stands approximately 20cm when finished.
- cut out two fabric rectangles to make the body of the house
- cut out two triangle shapes for the roof of your house
- cut out little shapes for your windows and door- you could do little rectangles or even circles for the windows. Get creative – you could add on a button for the door handle, ribbon for guttering or floral fabrics for a front hedge
- hand stitch or machine sew on these little appliques
- using a 1/2 cm seam sew allowance each roof section to a body section so you have the front and the back of the house ready to put together
- turn and place the right sides of the fabric in together and pin in place
- hand-sew or machine sew almost all the way around the house shape – leave a small gap for filling
- turn the fabric back out the right way by carefully pulling it through the gap you left. Use a blunt long object like a chopstick to poke out all the corners and edges of the house. You may like to iron flat your house at this stage
- next fill your house up with softie stuffing – carefully push it in until your house is as plump as you would like it to be
- and lastly use a blind/invisible hand stitch to close up the hole
And you are done! One super cute Little House Softie. A perfect little gift, cushion for your bed or lounge or a cute addition to your little miss’s doll collection.

Here’s a few of some of the other fun softies from this years blog hop-
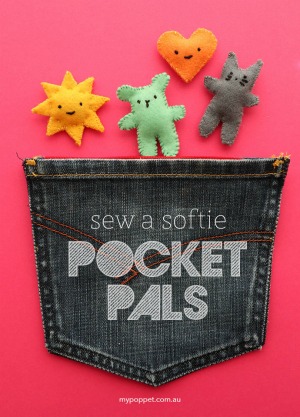
Sew a Softie Pocket Pals

Sea Life Plushie Keyrings
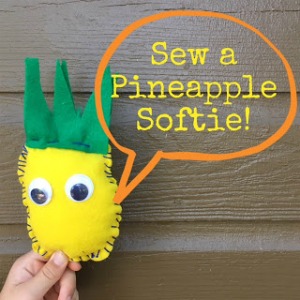
Sew a Pineapple Softie
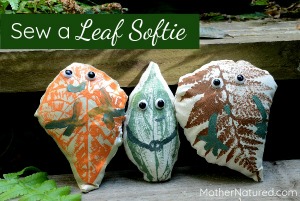
Sew a Leaf Softie