
Posted on 14 December 2012


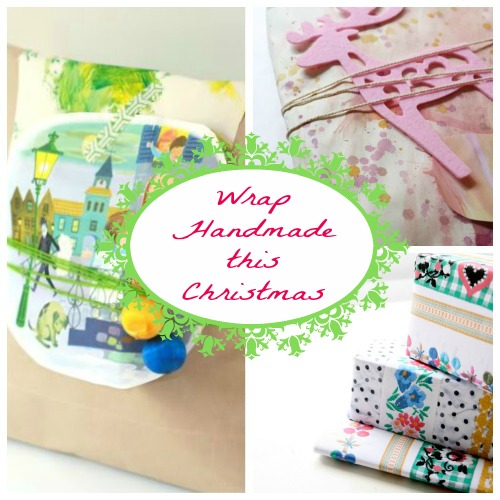

If you are giving handmade this Christmas, why not go the whole hog (or should I say ham? ) and hand make your wrapping too.
Some fun things you can use are:
As you can see this is just the tip of the iceberg. My point is you dont have to spend big $$ on expensive ribbon and shiny paper to get a fun interesting result. Save your money for whats inside the parcel.
I hope you have some fun with your gift wrapping this Christmas.
———————————
This Guest Post is brought to you by Cintia over at My Poppet. She is a blogger, crafter and online store owner. Want more My Poppet? Read the blog or visit the online store.
The Sassaby concept is simple – DIY Printable Parties, for the Budget Conscious Party Planner “ Creating Fabulous Parties for Everyone to enjoy!
Designed by Amy Sampson, the Sassaby Style is more in keeping with a Vintage and Handmade feel. The digital products are created using images of real paper, fabric and ribbon, and a great effort has been made to keep as true to a theme as possible, whether it be Vintage Circus or Alice in Wonderland.
Sassaby Products have also been created to be as user-friendly as possible, so all you have to do is Purchase, Edit and Print ~ Its that Easy!
Its a Retro Style Christmas at Sassaby!

Invite your friends and family to your Fabulous Christmas Party with the Editable Retro Christmas Invitation and Matching Envelope.
You will have the best looking Christmas Party Table in town with Sassabys Retro Christmas Party Labels, Party Circles and Drink Bottle Labels, along with Christmas Bingo to entertain your guests. Hang the editable Christmas Banner, put the printable Place Cards in place, and you’re all set to have a very Merry Christmas!
For more information, please head to the Sassaby website , facebook page, or blog
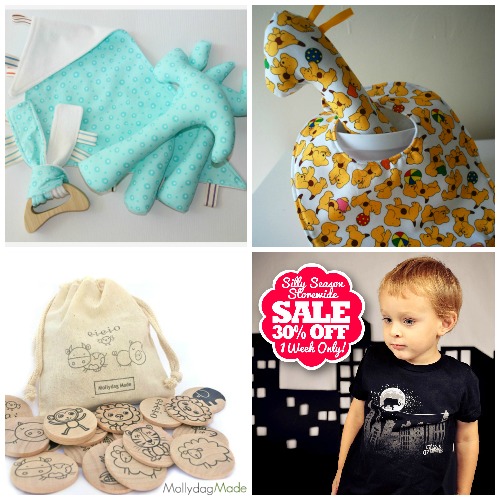
Alice and Lilly is a small boutique for little people that offer exquisite, unique hand-crafted accessories and goods from newborn through to big girls…
Alice and Lilly’s designs are a blend of funky, sweet, modern and most of all fun! They are made with care from beautiful pieces from all over the world including crochet, silk, lace, feathers, designer fabrics and ribbons.

Alice and Lilly has a wide range of Christmas Hair Accessories perfect for the season.
Baby clippies and headbands through to Alice bands and hair ties, something special for every age.
Alice and Lilly also has gorgeous gift tins available filled with lots of pretty goodies – wonderful secret Santa gift or stocking filler!
Prices from just $3.50
Express shipping available
FREE SHIPPING on all orders over $50.00
For more information, head to the Alice and Lilly Facebook page or the Alice and Lilly online store
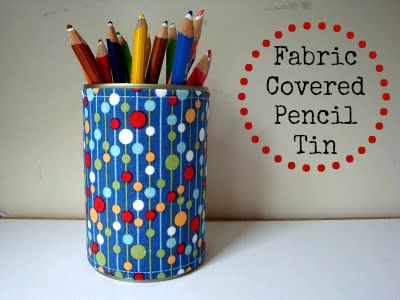
A huge thanks to the lovely Bec from Little Toot Creations for being kind enough to share her tutorial on how to cover a pencil tin in fabric.
———————————

If you want to give your workspace or the kids craft table an instant lift, heres a quick and easy project that even the older kids will be able to do themselves. These would also make a great gift for school teachers or grandparents.
Supplies:
Step 1: Make sure you are using a can with no sharp edges. Measure the height of your can (not including that little round lip on the top and bottom edge) and add 2cm (you will have a measurement of about 12.5cm).
Step 2: Next, mark out and cut (or cut using a rotary cutter and rule) a rectangle of interfacing that is 26cm wide x the height you measured in step 1 (12.5cm).

Step 3: Fuse your interfacing to your fabric, and if you have a directional print remember that the long sides of the interfacing will be the top and bottom of your can.

Step 4: Cut around the piece of interfacing.

Step 5: Using a piece of cardboard if you have one, mark a pencil line 1cm from the long edge of your card. This will form your pressing template. Starting on the two long sides, turn under and press a neat 1cm hem. Topstitch each of the long sides down, about 5mm in from the edge. If you dont have a sewing machine, this could also be done by hand.

Step 6: Turn under ONE short end and press a 1cm hem. Top stitch as above. There is no need to hem the other short end. You should then having something that looks like this:

Step 7: Apply spray adhesive to the back of your fabric and starting with the raw end, carefully roll your fabric around the can. When you get to the hemmed end, apply a small amount of craft or hot glue and press down firmly.


———————————-
Thank so much for the easy tutorial Bec.
You can find Little Toot Creations at: