
Little Peanut
Style Aficionado


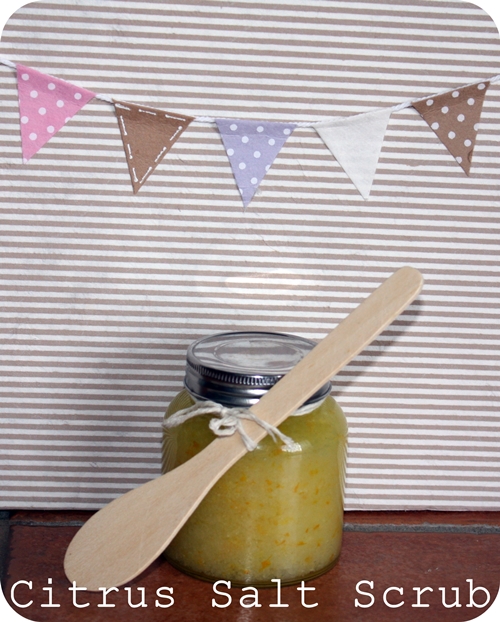
Here is another handmade Christmas present I’m giving out this year. Its my Citrus Salt Scrub.
This is so easy and cheap to make and will last a while too. All ingredients are easy to find at your local supermarket so they wont send you searching the town for them.

What you will need (this will make up one small jar like the picture above):
How to make:
In a medium dry bowl, combine all the salt, oil, and citrus zest. DO NOT let any water touch the mix as it will dissolve the salt.
Pour the mix into an airtight glass jar and store in a cool dry place.
Directions for use:
Just before you shower, while you are still dry, mix the scrub to ensure that salt has not settled in the jar. Add some to a wash cloth. Whilst showering, using a circular motion apply the Citrus Salt Scrub to your body, exfoliate, rinse off and dry with a clean towel. Your skin will feel soft and smooth once done.
When giving as a gift, I like to make handmade labels for the jar. One with the name, Citrus Salt Scrub for the front or the top of the lid and another for the back with directions for use. I also like to tie on a wooden spoon (available from cheap dollar stores) using twine or ribbon to the jar to complete the gift.
There you have it- a cheap, easy and natural handmade gift.
If you follow our facebook page (if you don’t, then your missing out), you would have seen the other day a pic of some clay tags I was making to add to our handmade Christmas pressies this year. They are really simple to make and loads of fun.
These clay tags can also be used as tree ornaments.
So here is my take on the clay tag.
What you will need is:


")

These are great for dressing up any gift not just at Christmas time. Have fun and get creative. If you have any questions, feel free to leave them in the comments and I will do my best to answer them for you.
Did you enjoy this tutorial? Is this something you would like to see more of? Different how to’s?
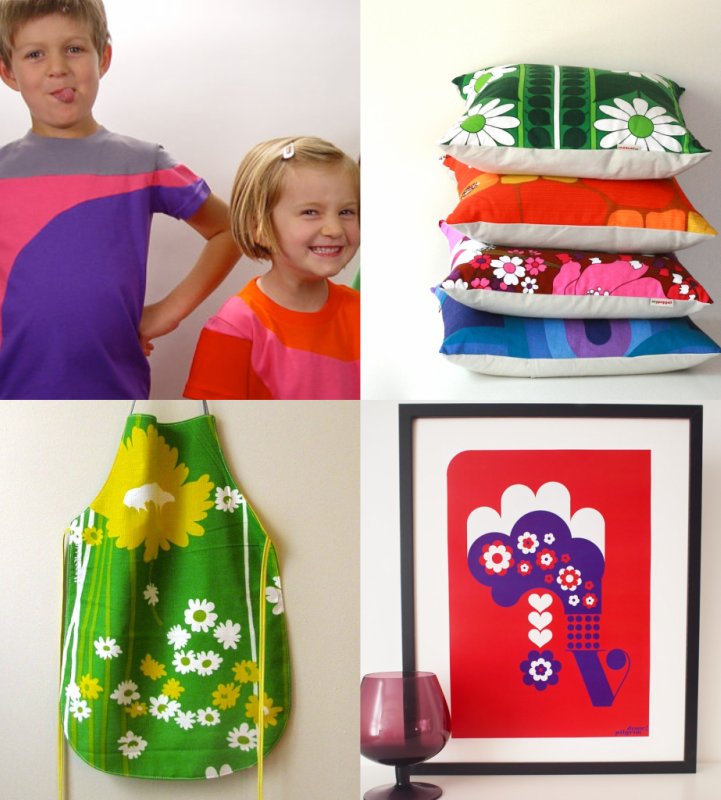
Did someone say colour? Here’s a big whack of 70’s vintage colour pop that will brighten up the dullest of days.

Tri Colour Tees – Boys n Girls
Retro Cushions – My Poppet
Retro Apron – Allie Craft
Letter Print – Draw Pilgrim
This guest post was brought to you by Cinti ~ My Poppet
The festivities start here and now at KatyJane Designs, with everything you need for a stylish and fun Christmas.

Start your countdown with our NEW Advent Calendar Stickers. Using small brown bags, red envelopes or boxes and a little treat or gift placed inside, the stickers will create a unique and affordable Advent calendar just for you.
Our NEW range of cards combine traditional Christmas reds with contemporary soft blues and a message of good times and peace on earth to all. Matching tags, twine and paper will wrap up your Christmas KatyJane style.
Hes our Cheeky Monkey and now hes our very own Santas Little Helper! Have some fun this year with our NEW Santa Signs, Greeting Cards and Badges “ were pretty sure theres going to be a cheeky little monkey in your house this Christmas!
Its time…for Christmas!
