Kitty & the Cat was established in 2011, hand making and embellishing kids clothes. Kitty & the Cat’s owner Felicity, had been making her creations for about 5 years but really only did it for friends and family. It wasn’t until her fiance’s 3 sisters (all mums) convinced her to really make a go of it. Felicity’s personalised tanks have been an instant hit for Kitty & the Cat as it gives mums (and dad’s) the opportunity to use their kids personalities and interests and put it on a canvas. Felicity also hand makes all of her girls dresses and tops. “I love to use bright, girlie fabric and a lot of mums ask me if I make them in their size! Perhaps a move into maternity wear?”
Head to Kitty & the Cat’s Facebook page and have a look at all their wares. They are so cute, while you’re there, become a fan and keep up to date will all the new happenings for 2012.
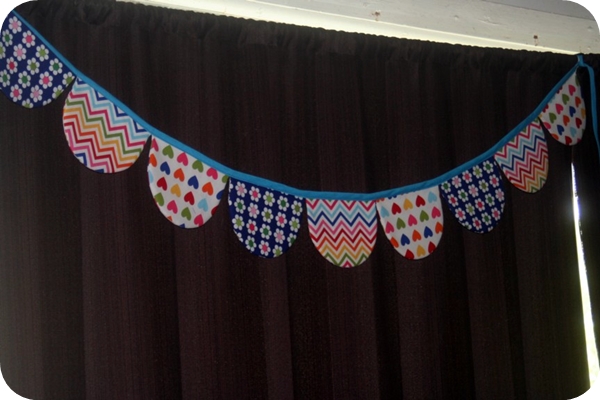
Bunting, bunting, bunting we all love bunting. Thank you to the lovely Hannah from Three Little Pigs for your take on the fabric bunting. Absolutely gorgeous, I cannot wait to give it a try.
Everybody loves a bunting, or so it seems. They have been popping up everywhere from baby’s rooms to markets stalls. They come in paper, and more recently, fabric, and you could pay a pretty penny for one to be made for you!
I may be doing myself out of a little business here, but I can’t keep a good thing a secret, so today, I’m going to share with you a step by step tutorial to make your own fabric bunting! I must apologise for changing fabrics a few times throughout the pictures, but my baby brain lingers, and I never remember to photograph all the steps! (On the upside, maybe it will give you a few ideas on fabric combinations?)
This is instructions for a half oval/rounded flag bunting. It’s not really different for triangle flags….just use a triangle template!
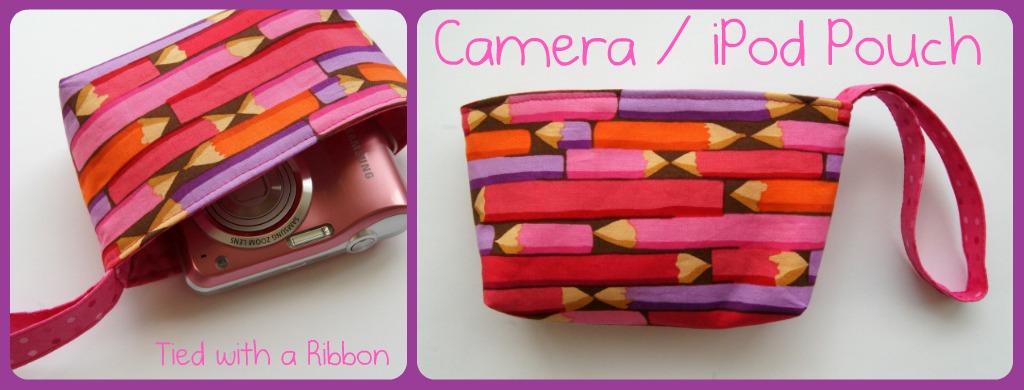
Do you love to sew? Need a new project to create? How about these great little camera or iPod pouch beautifully designed by Jemima from Tied with a Ribbon.
Materials
25cm x 25cm fabric for Outside
25cm x 25cm fabric for Lining
25cm x 25cm piece of Pellon (fusible, light weight)
26cm x 6cm strip of fabric for handle
3.5cm piece of velcro (hook and loop tape)
Cotton thread
Scissors
Directions:
1. Print out Pattern and cut out.
Camera Pouch Pattern
Using pattern cut out the outside fabric, lining fabric, pellon.
Cut out pattern
2. Cut out handle strip to required size and iron in half with the long raw edges matching.
Cut out handle strip
3. Unfold the handle strip and then fold one long raw edge into the centre and press.
fold and press one edge
fold and press both edges
4. Fold the other long edge into the centre and also press.
5. Fold the strip in half and press together.
Fold strip in half
6. Stitch along the open long edge of the handle and down the other side for a neat looking finish. Set aside for later.
Sew along edges of handle
7. Iron the Pellon onto the wrong side of your outside fabric piece. (Make sure you stick it glue side down and use a steam setting on your iron!)
Iron on Pellon
Sew side seams
8. Take your outside fabric and fold in half, pin the side seams. With right sides together sew down both the side seams with a 0.5cm seam allowance.
9. To make the corners, pull out the corners to have the side seam facing flat (the right sides of the fabric will be facing) in a horizontal direction.
Pin corners
Place a pin across the seam and stitch the corner closed in the opposite direction to the side seam.
Stitch corner
Repeat for the other corner.
10. Take your lining and fold the top of the Camera pouch in half to mark the centre. Place one of the sides of Velcro 1.5cm down from the top and in the centre. Pin and then sew around the outside to secure.
Sew on first velcro
Repeat for the other side.
Sew on second Velcro piece
11. To make the lining repeat steps 8 and 9 as you did with your outside fabric.
12. Take your sewn outside fabric pouch and turn right way out. Take the handle and fold in half. Pin the handle in place at the right side seam with the loop falling down. Sew across the top to secure in place.
Pin the handle
Pin the top edge
13. Take your lining and with right sides together put your lining inside your outside fabric to have the top raw edges matching. Pin at side seams and then around the pouch.
14. Sew around the top raw edge of your pouch 0.5cm leaving a 5cm gap so that you can turn inside out.
Sew top edge
15. Turn you pouch out the right way and then pin and top stitch around the top of the camera pouch closing the opening.
Topstitch finished edge
All finished “ your new pouch will fit many things. Not just for your Camera but your iPod or mobile phone will fit also. You might like it to hold you lipstick or make up “ what ever you like!
Thanks so much for this great tutorial Jemima. You can find Tied with a Ribbon at:
œSophisticated but at the same time dramatic and seductive, Tangerine Tango is an orange with a lot of depth to it, said Leatrice Eiseman, executive director of the Pantone Color Institute®. œReminiscent of the radiant shadings of a sunset, Tangerine Tango marries the vivaciousness and adrenaline rush of red with the friendliness and warmth of yellow, to form a high-visibility, magnetic hue that emanates heat and energy.