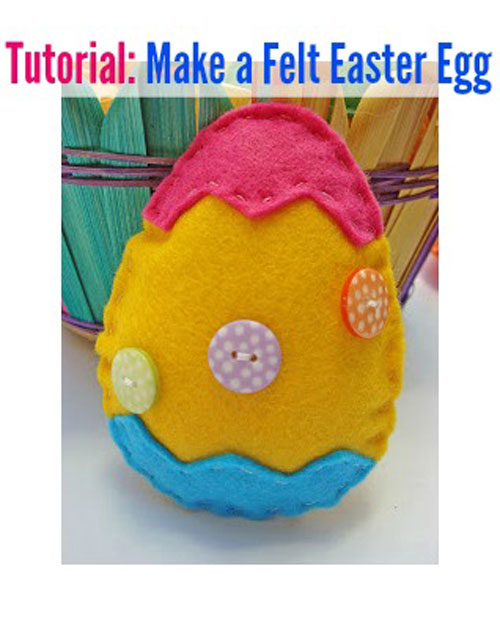

Let’s make a Felt Easter Egg.
Supplies you will need:
- 16cm x 10cm piece of yellow felt
- 6cm x 4cm piece of pink felt
- 7cm x 4cm piece of blue felt
- 14cm ribbon
- 3 buttons
- Co-ordinating cotton thread
- Toy filling

Step 1 “ Print and cut out Pattern pieces onto paper. Trace or cut around the egg pattern and top and bottom pattern pieces onto the felt. Cut out the felt shapes. Pattern is below and in the kits available.


Step 2 “Take one of your egg pieces and with your coordinating cotton thread sew a running stitch along the zig zag edges only of the top and bottom piece, through both layers.

Step 3 “ Sew your buttons into position. You could alternatively sew a piece of ribbon through the centre or use bias to decorate your egg.
Step 4 “ Take the ribbon and fold in half. With the second egg piece place the folded ribbon into the centre at the top and sew into place with cotton thread.

Step 5 “ Place your front and back egg pieces together (with the ribbon in between the layers). Sew around the outside of your egg, using running stitch with your co-ordinating cotton thread through the two layers.

Step 6 “ Stop about 2cm before the place where you started and stuff your egg using the toy filling. Sew the gap closed.


Kits to make 3 of your own Felt Easter Eggs are available at my Etsy Shop or ready made ones are also available.
Please remember this Tutorial is for personal use only.
Tutorial created by: Tied With A Ribbon

A sweet idea for Easter!
I just wanted to let you know, I clicked the Lollipop Baby Banner and it led me to photobucket. 🙂
[…] felt Easter egg ornament from Handmade Kids […]
Thanks for sharing 🙂
[…] Felt Easter eggs. Using Eco-fi felt (which is made from recycled plastic soda bottles), you can sew your own Easter egg stuffies. Decorate them with buttons and ribbons instead of […]
[…] Felt Easter eggs. Using Eco-fi felt (which is made from recycled plastic soda bottles), you can sew your own Easter egg stuffies. Decorate them with buttons and ribbons instead of […]
[…] Felt Easter eggs. Using Eco-fi felt (which is made from recycled plastic soda bottles), you can sew your own Easter egg stuffies. Decorate them with buttons and ribbons instead of […]
[…] Felt Easter eggs. Using Eco-fi felt (which is made from recycled plastic soda bottles), you can sew your own Easter egg stuffies. Decorate them with buttons and ribbons instead of […]
This is so cute! I’d love to have a basket full of these! Love for you to share it at our Easter Round up! 🙂 Marti
Thanks Marti- I’ll stop by 🙂
I’m so excited you stopped by and shared them!! I pinned them! 🙂
[…] Make A Felt Easter Egg Tutorial  //  Handmade Kids […]