A huge thanks to the lovely Bec from Little Toot Creations for being kind enough to share her tutorial on how to cover a pencil tin in fabric.
———————————

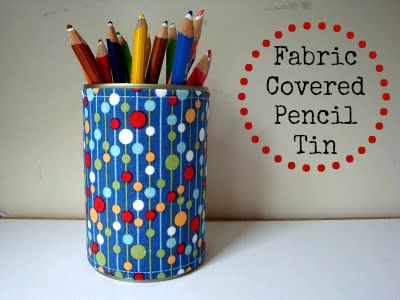
If you want to give your workspace or the kids craft table an instant lift, heres a quick and easy project that even the older kids will be able to do themselves. These would also make a great gift for school teachers or grandparents.
Supplies:
- 1 empty food can (400g size), washed thoroughly, labels removed
- Fabric of your choice (a 15cm cut or fat quarter will be ample)
- Heavy fusible interfacing
- Spray adhesive
- Craft glue
Step 1: Make sure you are using a can with no sharp edges. Measure the height of your can (not including that little round lip on the top and bottom edge) and add 2cm (you will have a measurement of about 12.5cm).
Step 2: Next, mark out and cut (or cut using a rotary cutter and rule) a rectangle of interfacing that is 26cm wide x the height you measured in step 1 (12.5cm).

Step 3: Fuse your interfacing to your fabric, and if you have a directional print remember that the long sides of the interfacing will be the top and bottom of your can.

Step 4: Cut around the piece of interfacing.

Step 5: Using a piece of cardboard if you have one, mark a pencil line 1cm from the long edge of your card. This will form your pressing template. Starting on the two long sides, turn under and press a neat 1cm hem. Topstitch each of the long sides down, about 5mm in from the edge. If you dont have a sewing machine, this could also be done by hand.

Step 6: Turn under ONE short end and press a 1cm hem. Top stitch as above. There is no need to hem the other short end. You should then having something that looks like this:

Step 7: Apply spray adhesive to the back of your fabric and starting with the raw end, carefully roll your fabric around the can. When you get to the hemmed end, apply a small amount of craft or hot glue and press down firmly.


———————————-
Thank so much for the easy tutorial Bec.
You can find Little Toot Creations at: