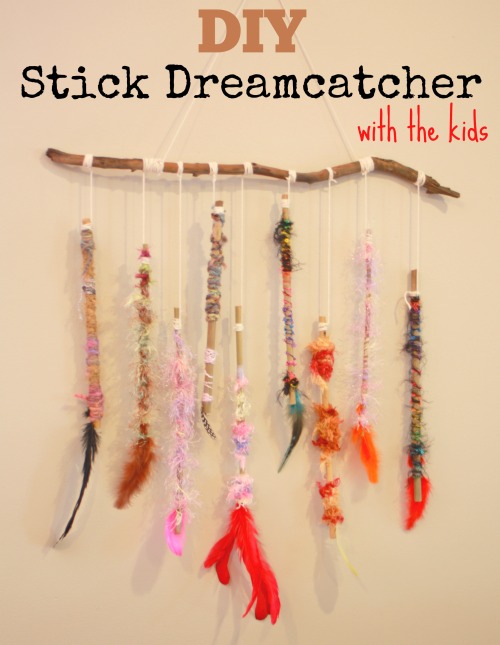
Time for some fun Kids Craft: make a Stick Dreamcatcher
This is a fun indoor craft activity to do with kids of all ages. The crafty supplies in this DIY are great sensory items for the little ones to feel and hold while helping out. While the activity itself is easy enough for older school aged children to do themselves with limited supervision (of course care is always needed when using scissors).
There are so many different ways to make your dreamcatcher – you can use sticks or dowel, wool or string, add beads & buttons. You can make it as long or as short as you like, as colourful or as simple as you like – the options are endless. Add you own personal touches and style. Have fun!
Supplies you will need:
- feathers
- wool, cotton, twine or other fibres
- string
- dowel lengths or small sticks
- large stick or branch for hanging
- kids safe scissors
- glitter spray
- optional- beads & buttons
Steps:
1. Choose a large stick or larger piece of wooden dowel to use as the main branch. It can be straight and smooth, or perhaps wavy or bumpy to add some character.
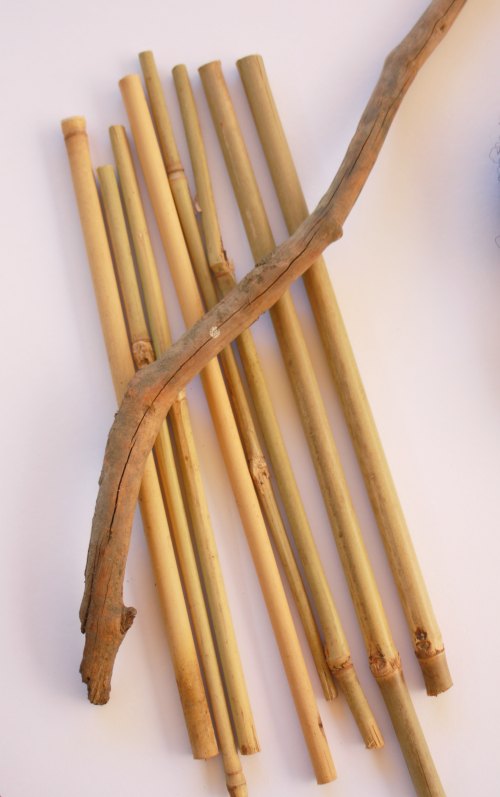
Step 1 – Choose your main branch and sticks
2. Decide how many sticks/dowels you would like to hang off your main branch. We used small pieces of wooden dowel.
3. Wrap and wind your pieces of wool, thread, cotton and fibre up and down your sticks – be as creative as you like. Use different textured fibres to create different looks – fluffy, smooth, thick and shiny fibres.
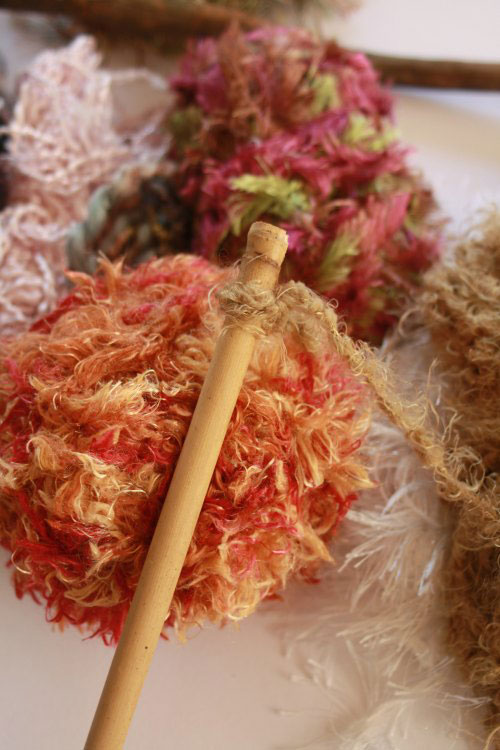
Step 3-start with a knot at one end
Step 3- Start twisting and wrapping on your wool pieces
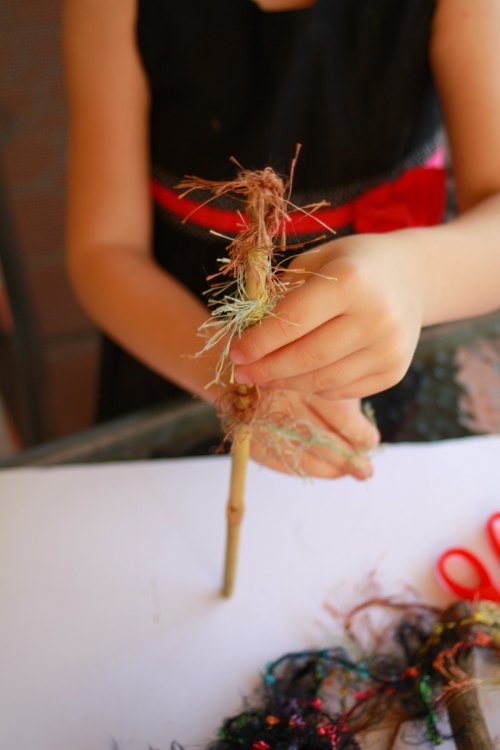
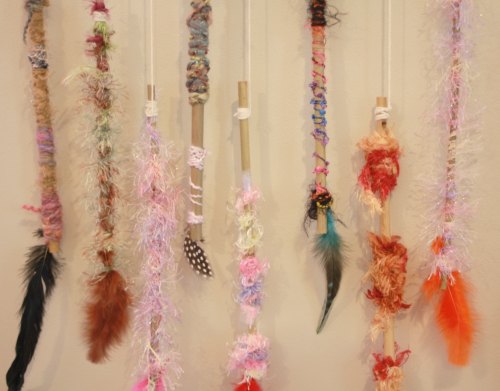
4. Attach a feather or a few at one end of your stick- you can easily slide your feather up and under your fibres. Optional- perhaps you would like to thread a few buttons or beads up the quill of your feather at this stage too.
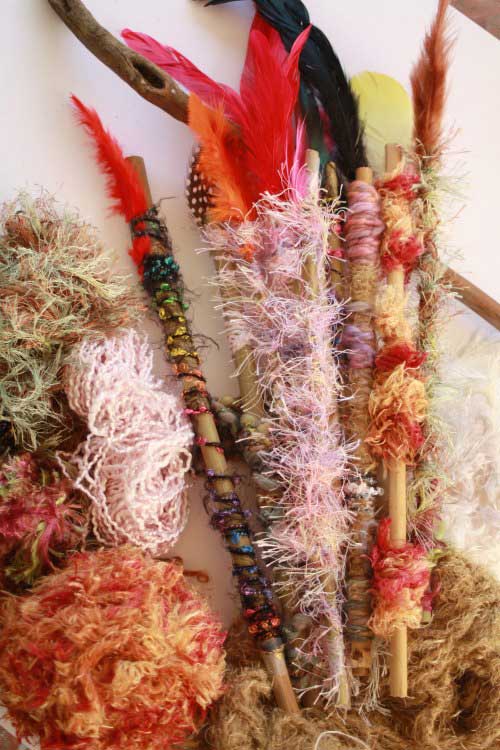
Step-4-Attach-your-feathers
5. Secure tightly a piece of string or twine to the other end of your stick/dowel- leaving a long end attached to use to secure to your main branch.
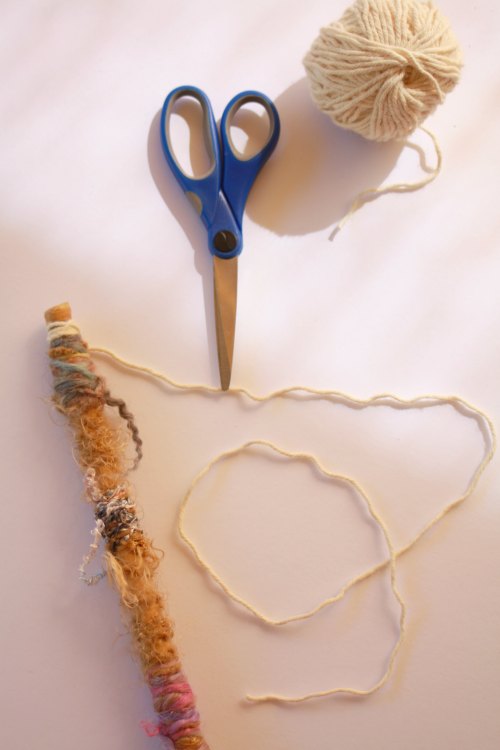
Step 5 – attach string to end of dowel pieces
6. Hold up your main branch and find the middle of it. We need to attach a loop of string/twine to hang up your art work. Attach one piece of string to either side of the middle of your stick – hold it up and see if it balances. We want it to hang evenly on your wall.
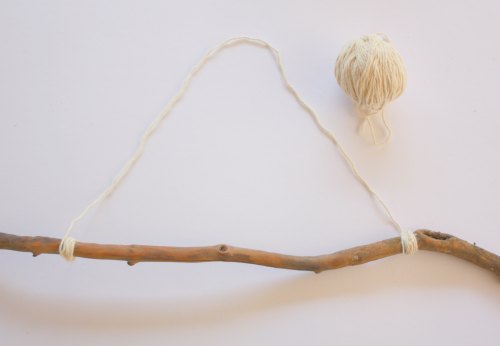
Step 6 – attach a string loop to your branch
7. Decide how you would like to space out your sticks along your main branch- perhaps you would like them to hang at the same length, or some to sit higher or lower than others. Then securely tie and knot your sticks along the main branch. Hold it up and admire your handy work!
Step 7- tie your sticks along the branch
8. Last step, why not add a touch of glitter and make your dreamcatcher sparkle. Just use a glitter spray can (easily found at craft and discount stores)
Now you’re all done. How does your Dreamcatcher look? Unique and amazing I’m sure!
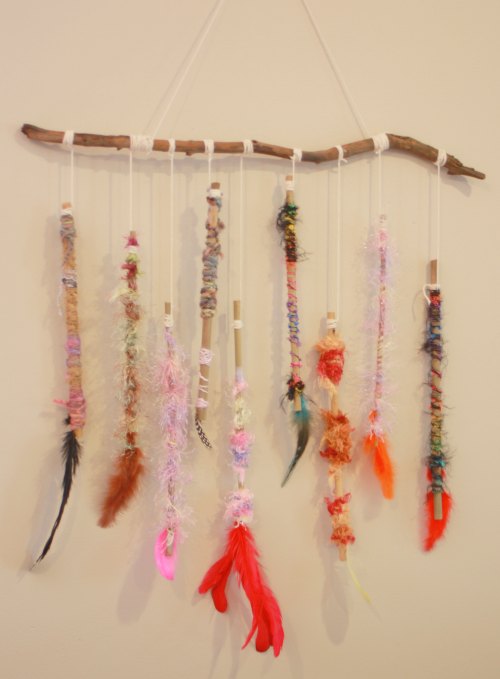
You are now finished your Dreamcatcher
Kids Craft: make a Stick Dreamcatcher.
Share your creations with us, we would love to see how they turned out. Leave a comment below or pop over to our Facebook page and say hello.
Want a cool kids craft idea - check out this tutorial at Handmade Kids Click To Tweet
DIY Stick Dreamcatcher
Such a gorgeous project, and so perfect for the wet weekend we are expecting. Thanks for sharing Kylie!
Thanks so much Lauren- we had fun making it 🙂 Stay safe over the wet weekend!
This project turned out brilliantly, looks like you had fun.
Thanks so much Handmade Cooperative 🙂 We had a great time creating this one. It’s hanging up in little miss’s room.